

Building an Integration
Add a new partner to your directory
This is the everyday task: someone you integrate with should show up in the directory, so you add them as one Integration. Each integration is its own entry with a logo, a write-up, a link out to the partner, and whatever filters and badges apply. The editor has a few more fields than a plain post, but the core flow is the same and you can ignore the extras until you need them.
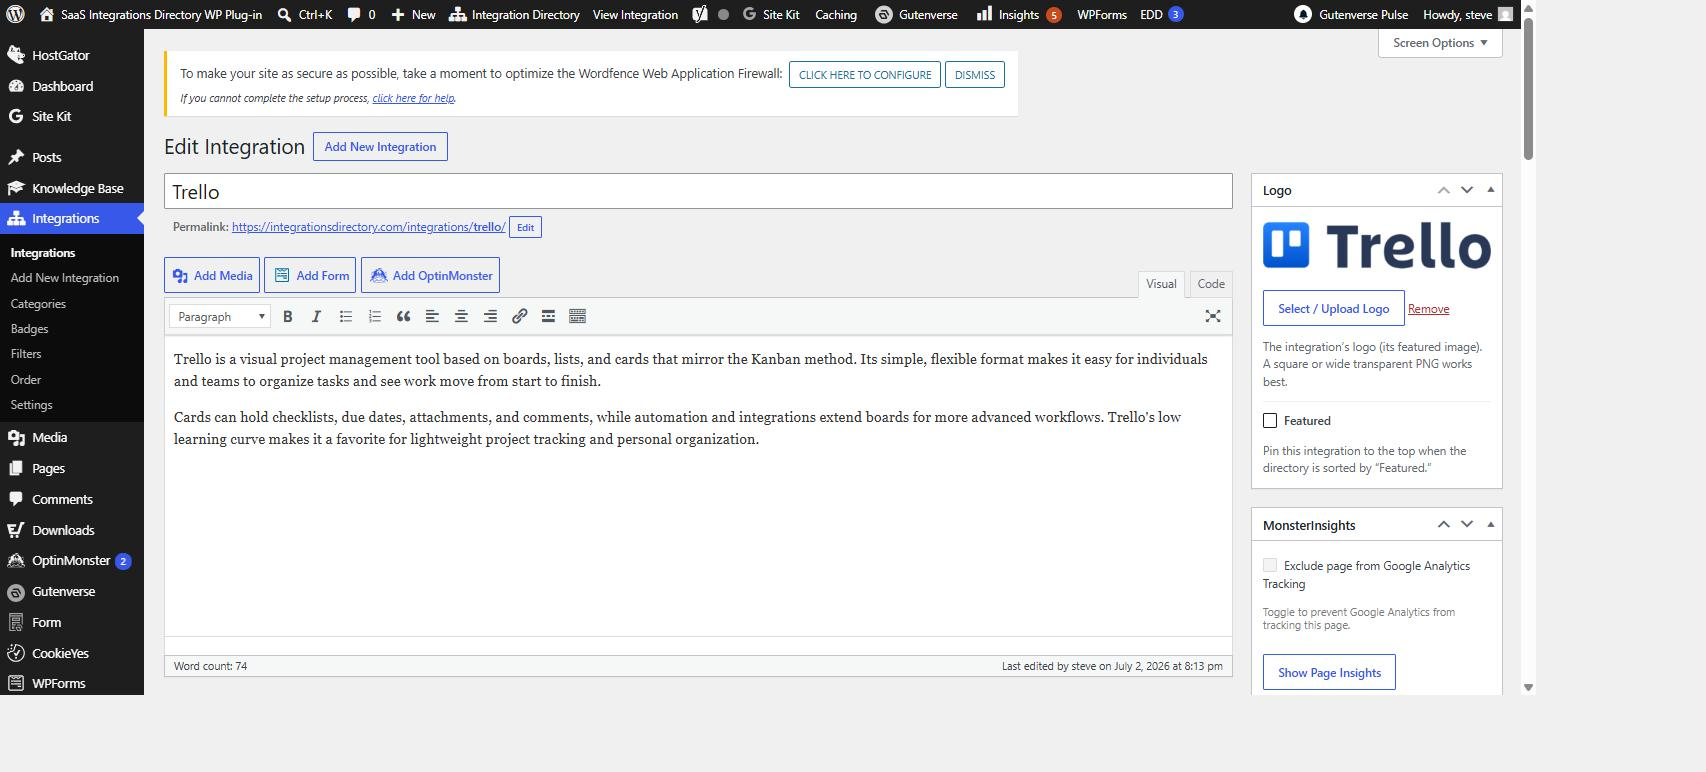
In wp-admin, go to Integrations → Add New. You’ll land on a familiar editor screen with a title field, a body editor, and a set of boxes down the side.
Title, slug, and the H1
Type the partner’s brand name into the Title field — just the name, e.g. Slack or QuickBooks Online. That one value does triple duty: it becomes the H1 heading on the integration’s detail page, it generates the URL slug at /integrations/{slug}, and it’s the match key used by CSV import. Keep it clean and consistent with how the partner spells their own name.
Heads up: the slug is created from the title the first time you save. If you rename an integration later, WordPress keeps the original slug unless you edit it by hand — so get the name right before you publish, or fix the slug deliberately if it matters for a shared link.
Add the logo
Find the Logo box in the side column. Click Select / Upload Logo to open the Media Library, then either upload a new file or pick an existing one. A square or wide transparent PNG looks best in the listing grid — a transparent background lets the logo sit cleanly on the card no matter your theme’s colors.
While you’re in the Media Library, set the image’s alt text to the partner’s name (e.g. Slack logo). That’s good for accessibility and for anyone reading the page with a screen reader. The logo is stored as the integration’s featured image — there’s no separate logo field.
The Featured checkbox
The Logo box also has a Featured checkbox. Tick it to pin this integration to the top of the directory whenever visitors use the default Featured sort (flagged integrations come first, then everything else A–Z). Use it for your headline partners; leave it unchecked for the long tail. For how featured fits with the other sort modes, custom drag-and-drop order, and the analytics that unlock Most popular, see Sorting, Ordering & Analytics.
Write the body
Use the main editor to describe the integration: what it does, what it connects, why someone would want it. This is the content that appears on the detail page at /integrations/{slug}, below the logo and the Visit Website button. Plain, helpful paragraphs are all you need — treat it like a short product blurb, not a manual.
The Details box
Below the editor sits the Details box, which holds the per-integration fields in this order: Preview Text, Meta description, Website URL, Call-to-action link, Call-to-action label, Video URL, Screenshots, and Resources. Every one is optional — a title, a logo, and a category are enough to ship a listing — but each adds something to the card or the detail page.
Preview Text and the LEARN MORE link
Fill in Preview Text with a one-line summary. This short blurb shows on the directory listing card and switches on the LEARN MORE link that takes visitors to the detail page.
Heads up: Preview Text is optional. If you leave it blank, the card simply shows no blurb — but the entire listing is still clickable, so visitors can always reach the detail page. The text just gives them a reason to click.
Meta description (SEO)
The Meta description field is labeled SEO, optional. Whatever you type here feeds the integration’s search and social tags — the meta description plus the Open Graph and Twitter Card previews on its detail page. Keep it to a tight sentence or two aimed at someone scanning a search result.
If you leave it blank, the plugin falls back automatically: it uses your explicit Meta description first, then the Preview Text, then a trimmed opening from the body content. So you’ll always get a reasonable description — filling this field just lets you control it deliberately. For how these tags are generated, how the plugin defers to an active SEO plugin, and the JSON-LD it emits, see SEO, Social & AI Discoverability.
Website URL and the Visit Website button
Enter the partner’s site in the Website URL field (e.g. https://slack.com). When set, this renders a Visit Website button on the detail page, just under the back link. Leave it empty and the button simply doesn’t appear.
Heads up: Website URL is a plain outbound link to the partner. If you want visitors to reach you instead — to request an intro or a demo — use the Call-to-action fields below, or the site-wide call to action described in Call to Action & Lead Capture.
Call-to-action link and label (per-integration override)
The Call-to-action link (optional override) and Call-to-action label (optional) fields let you set a call-to-action button just for this integration, overriding the global one configured under Integrations → Settings → Call to Action. Use them when one partner needs a different destination or wording than the rest of your directory. Fill in the link to change where the button points; fill in the label to change its text. Leave both blank and the integration simply uses the global call to action.
Both fields support the {integration} merge tag, which is replaced with this integration’s name when the button renders (URL-encoded when it appears inside the link). The button shows at the bottom of the published detail page, after the content. For the full set of modes — button, embedded form, or none — and how the global settings and merge tags work together, see Call to Action & Lead Capture.
Richer profile fields
The remaining Details fields turn a basic entry into a fuller profile on the detail page:
- Video URL — paste a YouTube or Vimeo link and it embeds automatically via WordPress oEmbed.
- Screenshots — multi-select images from the Media Library to show a gallery of the integration in action.
- Resources — add labeled links such as Documentation or Case study, one Label + URL row at a time.
These three are set in the editor only — they are not part of CSV import. You can skip all of them and still ship a perfectly good listing. For exactly how each one renders and the best way to use them, see Richer Integration Profiles.
Assign categories
Use the Categories box (the integration_category taxonomy) to file the integration under one or more categories — the same way you’d categorize a post. Categories are public and hierarchical, and you can manage them right here from the editor: check the ones that apply, or add a new category on the spot. For the full walkthrough, see Setting Up Categories.
Apply filter groups
Filters are how visitors narrow the directory by facet — things like Pricing, Platform, or Setup. Each facet is its own filter group, and the editor shows one checkbox section per group in the Filters box in the side column. Work down them and check the options that apply to this integration in each group. An integration can match several options within one group and span multiple groups.
This replaces the older single Custom Filter step. The grouped sections you see here are defined on Integrations → Filters — that’s where you create, rename, and populate the groups. There can be any number of groups, plus a main filter that is always present: you can rename it or empty its options, but it can’t be deleted. Other groups are deletable. To set up the facets themselves — and to understand the matching, which is OR within a single group (an integration matches if it has any of the selected options) and AND across groups (it must satisfy every group you’ve narrowed) — see Managing Your Filters.
Assign badges
If you use partner tiers or certifications, check the relevant Badges on the editor (e.g. Premier, Certified) using the Badges taxonomy box. Assigned badges render as small pills on the directory listing. Note that badges are labels, not a filter facet — visitors can’t filter by them. See Badges & Tiers for the full walkthrough on creating and managing the badge set.
Set status and publish
Status maps to WordPress’s normal publish states:
- Active = Published — the integration appears in the directory.
- Inactive = Draft — saved but hidden from visitors.
When the entry is ready, click Publish (or Update on an existing one). The directory page, wherever you’ve placed the [[integration_directory]] shortcode, picks it up automatically.
Adding many partners at once
Doing one-by-one is fine for a handful. For a larger batch, use CSV import under Integrations → Settings → Import / Export. Rows are matched by title, so an import updates an existing integration or creates a new one. A blank cell leaves that value untouched, and any categories or filter-group options you reference are created automatically if they don’t exist yet.
CSV import covers the core listing fields — the title, the body content, the listing blurb, categories, the main filter’s options, publish status, the logo image, and the partner website. It does not cover everything in the editor.
Heads up: the richer fields are editor-only. The Meta description, per-integration Call-to-action fields, Badges, Video URL, Screenshots, and Resources are set in the editor after import, not through the CSV. For the exact column list and how each column behaves, see Importing and Exporting.
Related articles
- Richer Integration Profiles — how Video URL, Screenshots, and Resources render on the detail page.
- Call to Action & Lead Capture — the global call to action, its modes, and the
{integration}merge tag. - SEO, Social & AI Discoverability — how the Meta description feeds the search and social tags and the JSON-LD.
- Setting Up Categories — create and assign the categories visitors browse by.
- Managing Your Filters — create filter groups, group options, and faceted logic.
- Badges & Tiers — create and assign badge labels.
- Sorting, Ordering & Analytics — how Featured, custom order, and Most popular work.
- Importing and Exporting — the full CSV column list and bulk import behavior.